
Keycloak allows us to customise its themes. This enables us to provide a user interface that remains consistent across all of our applications, ensuring a better user experience for everyone.
Prerequisites
- I’m going to work with Keycloak running as a Docker service. You can learn how to run Keycloak with Docker in the Keycloak in Docker #1 – How to run Keycloak in a Docker container post. As a result of my previous work, I have two services running on my machine:
|
1 2 3 4 |
docker ps CONTAINER ID IMAGE PORTS NAMES 774a1d259bf9 jboss/keycloak:15.0.2 8443/tcp, 0.0.0.0:8024->8080/tcp, :::8024->8080/tcp keycloakindocker_keycloak_1 6f10181d012b postgres:14.1-alpine 0.0.0.0:5433->5432/tcp, :::5433->5432/tcp keycloakindocker_keycloakdb_1 |
- My Keycloak instance contains an example realm and users. You can read about importing a realm in the Keycloak in Docker #2 – How to import a Keycloak realm post.
- The starting point for the work presented in this post is contained in the commit ada085f379746d91bf8f3024843780b2585c415f.
Disable theme caching
The Keycloak documentation recommends disabling the cache for themes while working on creating our custom theme:
While creating a theme it’s a good idea to disable caching as this makes it possible to edit theme resources directly from the
https://www.keycloak.org/docs/16.1/server_development/#creating-a-themethemesdirectory without restarting Keycloak. To do this editstandalone.xml. (…) Remember to re-enable caching in production as it will significantly impact performance.
Therefore, we’re going to write a script that disables caching themes and run it as a startup script for our container. First, I’m going to add the keycloak/scripts/disable-theme-cache.cli file to my repository:
|
1 2 3 4 5 |
embed-server --std-out=echo --server-config=standalone-ha.xml /subsystem=keycloak-server/theme=defaults/:write-attribute(name=cacheThemes,value=false) /subsystem=keycloak-server/theme=defaults/:write-attribute(name=cacheTemplates,value=false) /subsystem=keycloak-server/theme=defaults/:write-attribute(name=staticMaxAge,value=-1) stop-embedded-server |
Next, I’ll provide the script as a volume for the container’s startup-scripts directory:
|
1 2 3 4 5 6 7 8 9 10 11 12 13 14 15 16 |
version: '3.3' services: keycloak: image: … ports: … environment: … volumes: … - ./keycloak/scripts/disable-theme-cache.cli:/opt/jboss/startup-scripts/disable-theme-cache.cli networks: … depends_on: … … |
You can find the work presented in this section in the 83e26988848587700ff453bb1ac80bb0c64feda5 commit.
Customising
A Keycloak theme contains styles and assets for different groups of pages – called types in the documentation:
A theme can provide one or more types to customise different aspects of Keycloak. The types available are:
–
Account– used to style user profile views;–
Admin– with styles for the admin UI;–
–
Login– used to customise login forms (login, register, forgot password);–
https://www.keycloak.org/docs/16.1/server_development/#theme-typesWelcome– the Welcome page.
For the sake of simplicity, I’m going to customise only two types – Login and Account. In the first place, I’m going to create an empty directory for my theme:
To create a new theme start by creating a new directory in the
https://www.keycloak.org/docs/16.1/server_development/#creating-a-themethemesdirectory. The name of the directory becomes the name of the theme. For example to create a theme calledmythemecreate the directorythemes/mytheme.
Comsequently, I’m going to create the backend/docker/keycloak/themes/custom directory as I want to name my theme custom. Furthermore, I’m going to mount it as a volume in my keycloak service:
|
1 2 3 4 5 6 7 8 9 10 11 12 13 14 15 16 |
version: '3.3' services: keycloak: image: … ports: … environment: … volumes: - ./keycloak/themes/custom:/opt/jboss/keycloak/themes/custom … networks: … depends_on: … … |
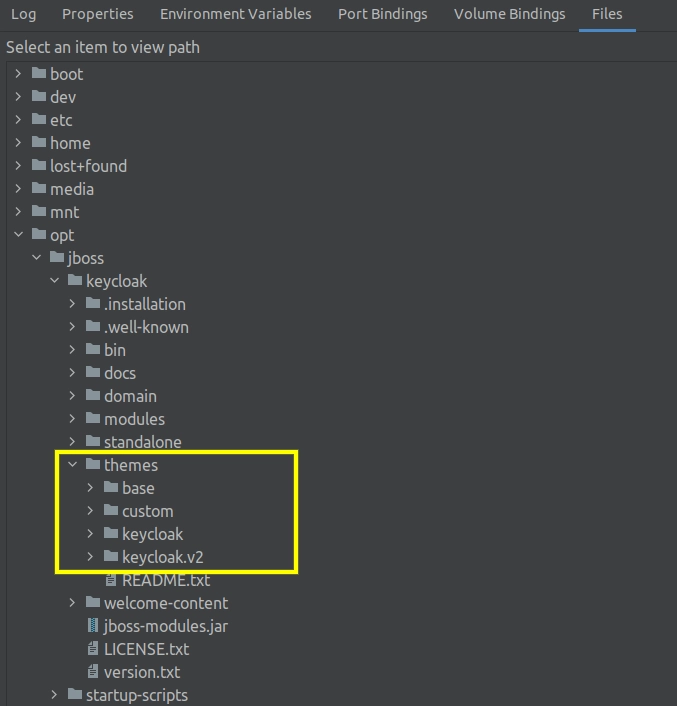
As a result, we’ll see my custom theme among other Keycloak themes after restarting the service:
Customise Keycloak theme for the login type
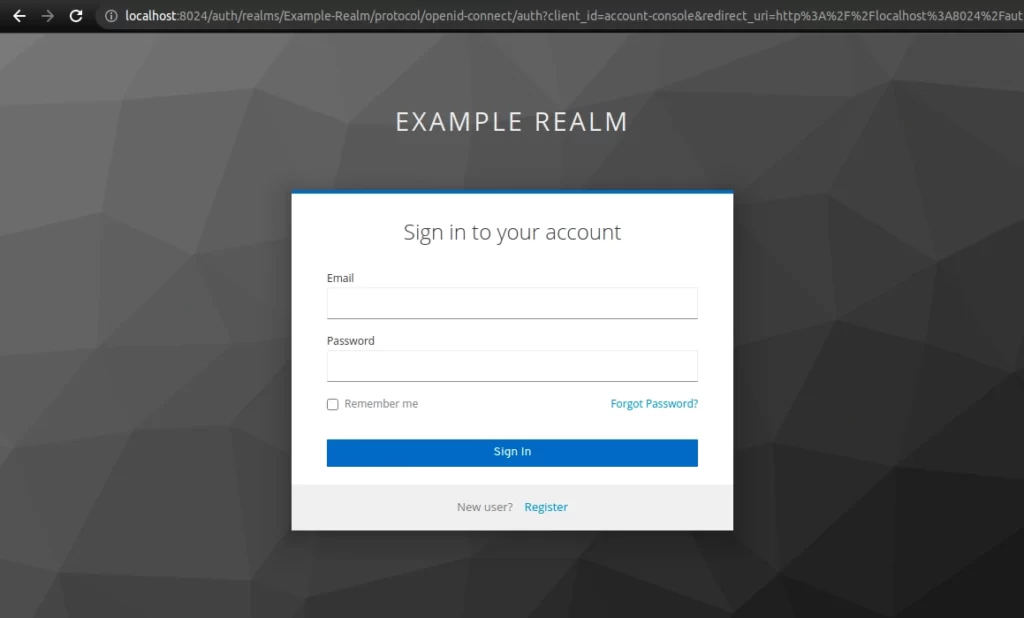
Of course, the custom theme is still empty and we can’t apply it. In other words, all Keycloak pages use default styles. We’re going to start our customisation from the login type. Visit: http://localhost:8024/auth/realms/Example-Realm/account link to examine the standard Keycloak login type:
I’m going to create the login folder inside the custom directory. However, I’m not going to fabricate my theme completely from scratch. I’ll follow the documentation on creating a new theme and extend the Keycloak theme:
Most likely you will want to extend the Keycloak theme, but you could also consider extending the base theme if you are significantly changing the look and feel of the pages. The base theme primarily consists of HTML templates and message bundles, while the Keycloak theme primarily contains images and stylesheets.
https://www.keycloak.org/docs/16.1/server_development/#creating-a-theme
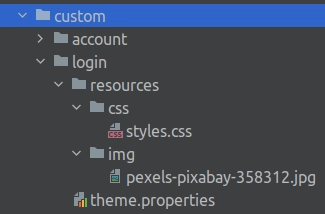
For reference, this is the structure of the login folder that we’re going to create:
Change background image
First, I want to use a different picture as a page background. Therefore, I’m going to create the custom/login/resources/img folder and download the new picture there (pexels-pixabay-358312.jpg).
Change login styles
Next, I’m going to override some styles in the custom/login/resources/styles.css:
|
1 2 3 4 5 6 7 8 9 10 11 12 13 14 15 16 17 18 19 20 21 |
/*backend/docker/keycloak/themes/custom/login/resources/css/styles.css*/ :root { --pf-global--primary-color--100: #ff0054; --pf-global--primary-color--200: #d60248; --default-background-color: #97A1CDFF; --link-hover-color: #02679a; } .login-pf body { background-image: url('../img/pexels-pixabay-358312.jpg'), linear-gradient(135deg, var(--default-background-color) 0%, #A96699FF 100%); } .login-pf a:hover { color: var(--link-hover-color); text-decoration: none; } .pf-c-form-control { --pf-global--primary-color--100: unset; } |
Generally speaking, my styles replace the default picture and provide a gradient as a fallback background. Moreover, I’m changing the primary colour (providing the lighter and darker shades) and the colour and text decoration of links for the hover pseudo-class. Last but not least, I’m resetting the default primary colour for forms as it would override the one I set in the :root section.
Configure the custom login type
In order to include our styles in the theme, we need to create the custom/login/theme.properties file. Each type has to have this file as the source of its configuration. Since we’re extending the login type from the Keycloak theme, let’s see the theme.properties file for our parent as a reference:
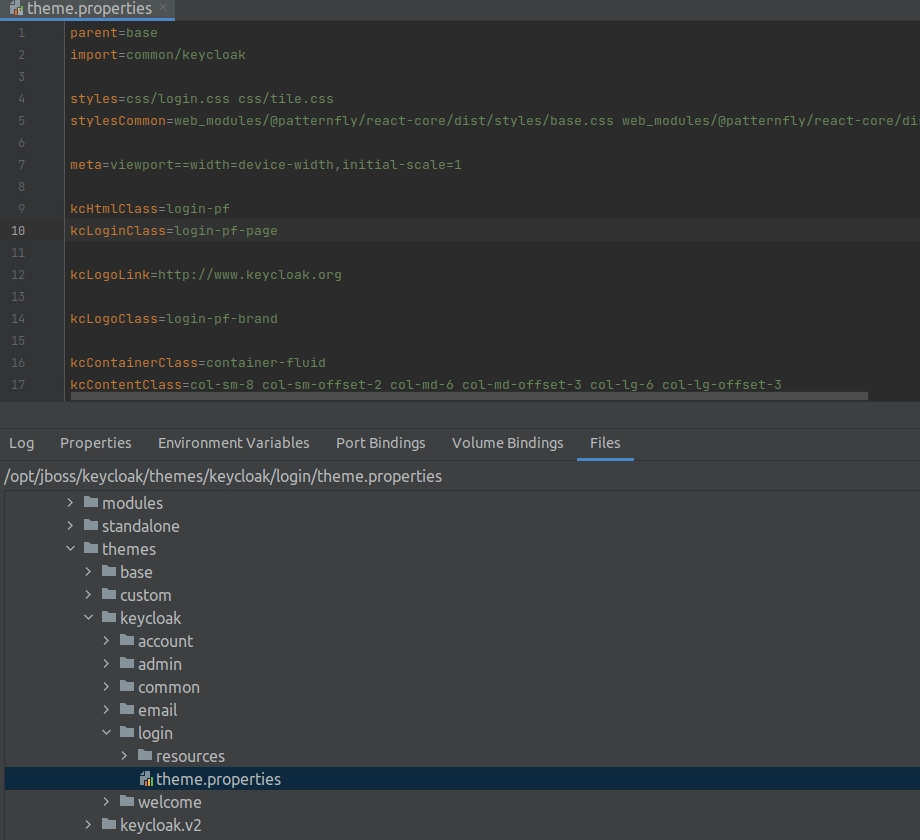
As we can see, we definitely need to override the parent property for our theme. We also can’t forget to include the Keycloak stylesheets before providing our own:
To include the styles from the parent theme you need to load the styles from that theme as well.
https://www.keycloak.org/docs/16.1/server_development/#stylesheets
The resulting theme.properties file for the login type for the custom theme looks as follow:
|
1 2 3 |
#backend/docker/keycloak/themes/custom/login/theme.properties parent=keycloak styles=css/login.css css/tile.css css/styles.css |
Enable the customised type
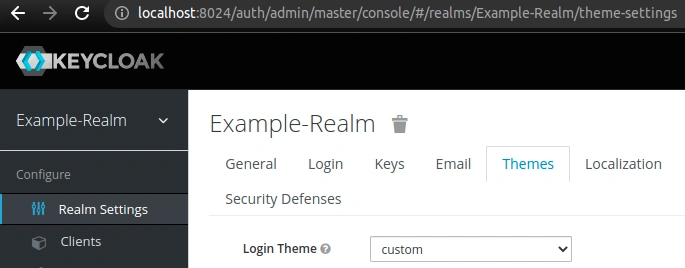
Restart the service so that the volume with our custom theme is mounted (if you haven’t restarted it after creating the volume). Login as admin to the admin panel (http://localhost:8024/auth/) and choose the custom theme as a value for the Login Theme property in the realm settings:
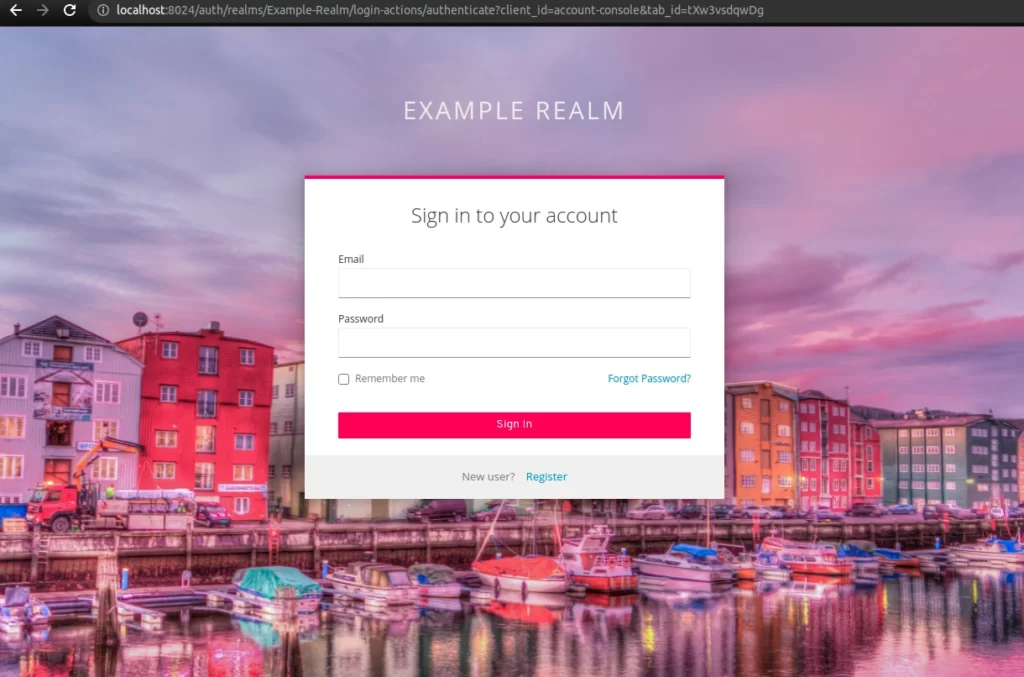
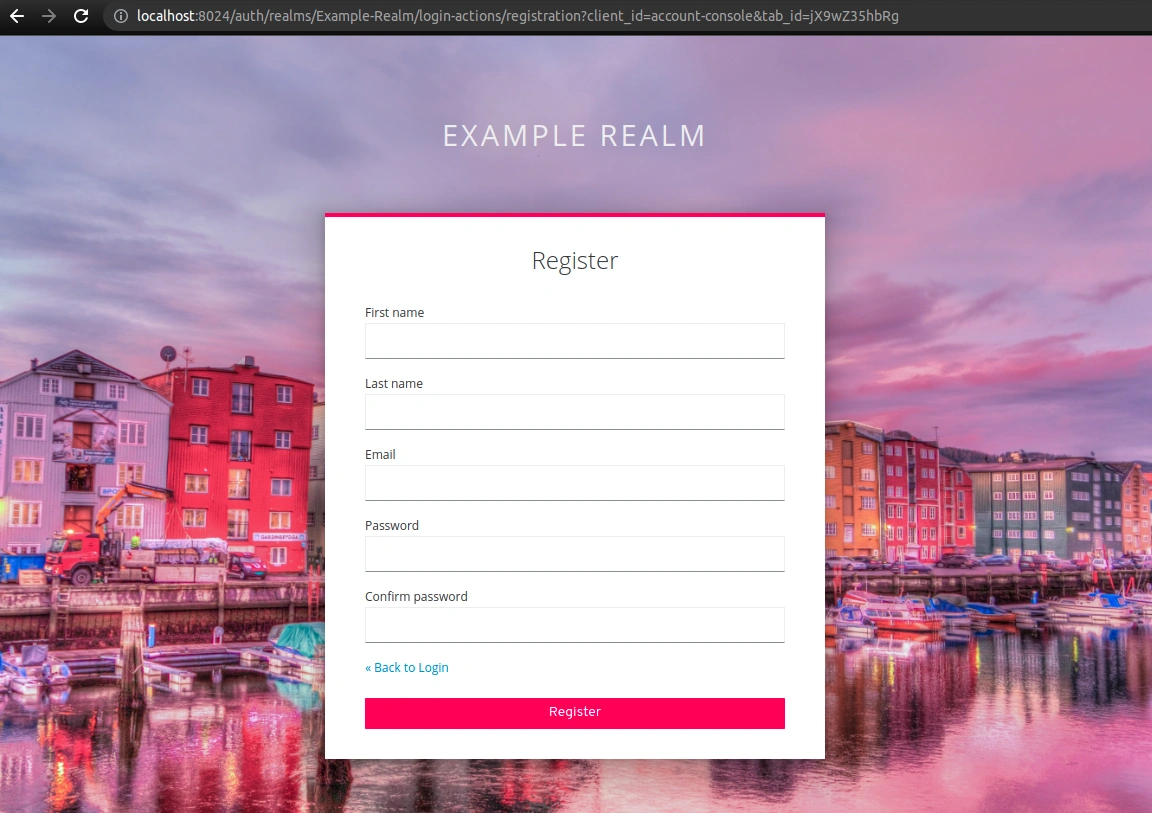
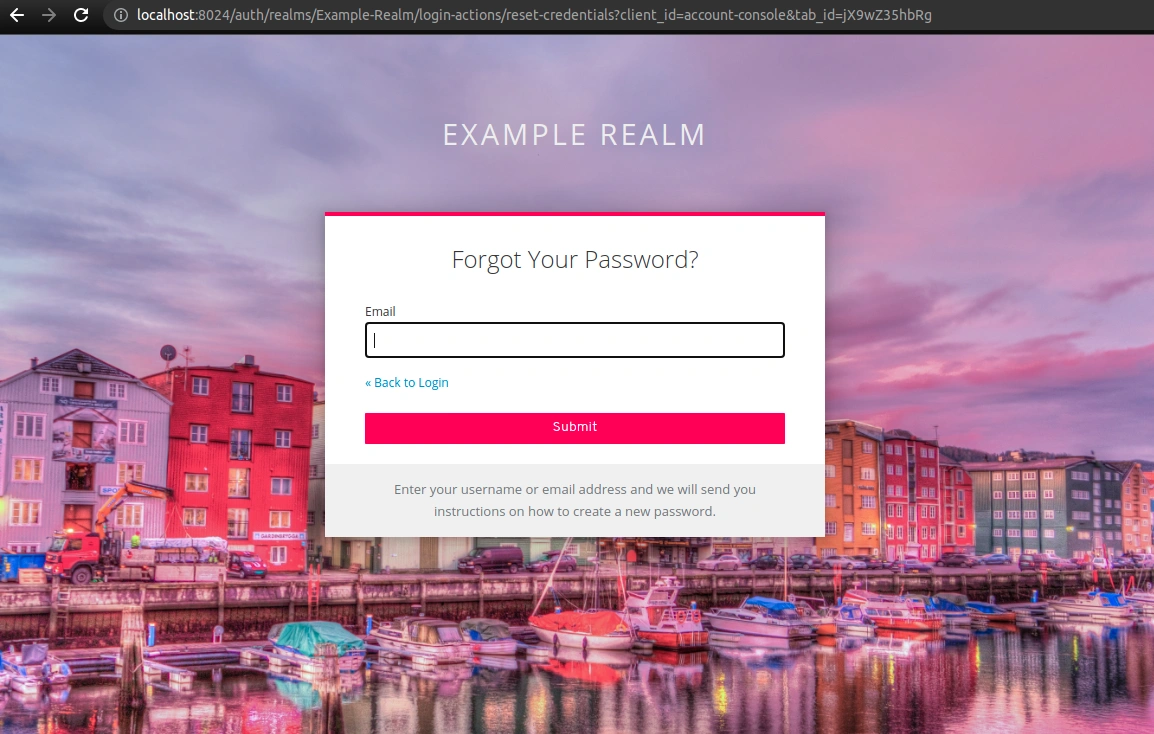
Verify changes of the login type
Now, visit the: http://localhost:8024/auth/realms/Example-Realm/account page and verify that the new theme is used instead of the default one:
You can see the work presented in this article in the bbce63fb404cb5eade3019da8ae7a95d229a8bf0 commit.
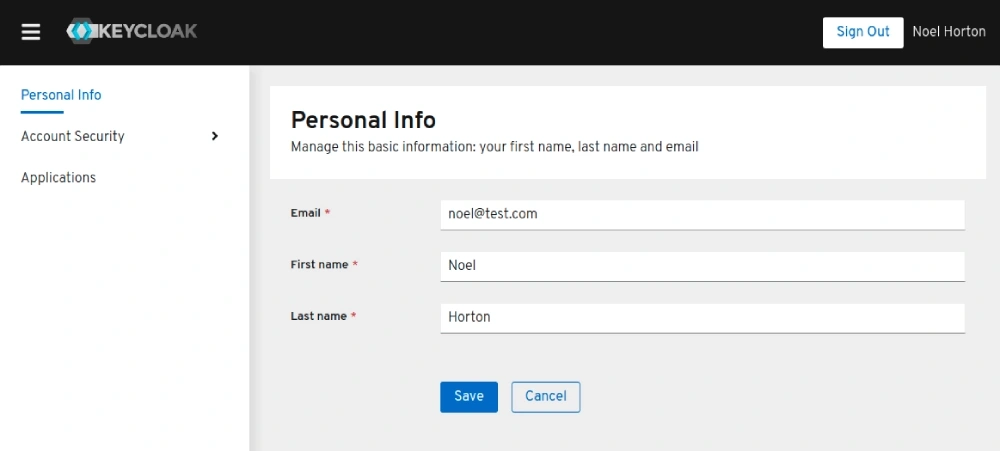
Customise Keycloak theme for the account type
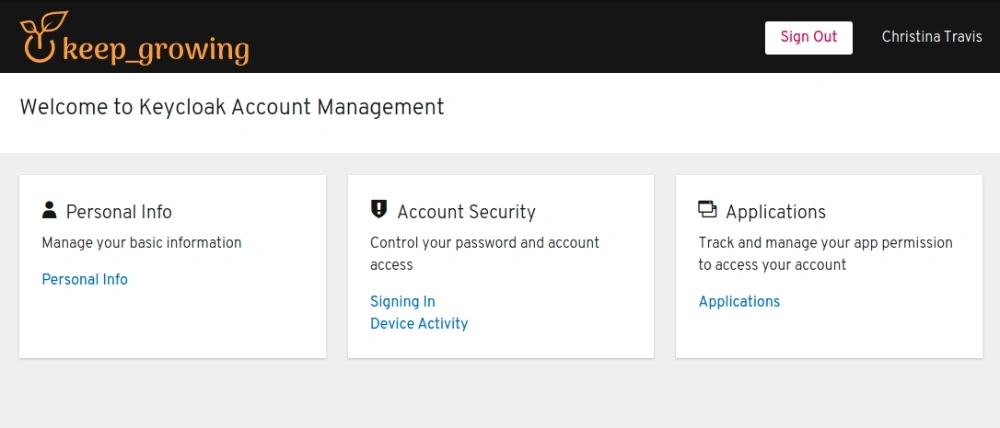
You can see the default keycloak.v2 theme used for the account type on the image below:
To keep this section concise, I’m not going to include the content of the default keycloak.v2 theme. You can find it in the keycloak container under the opt/jboss/keycloak/themes/keycloak.v2 path:
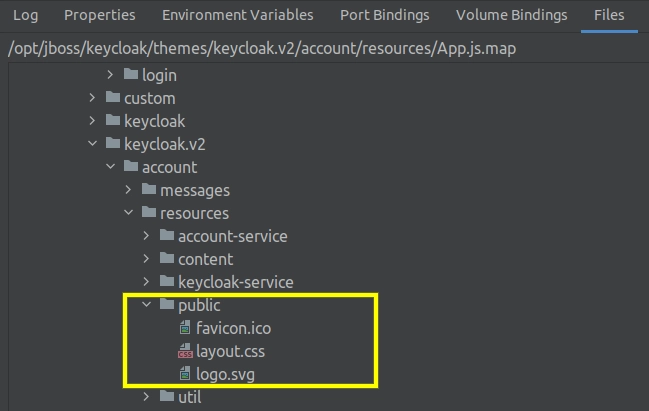
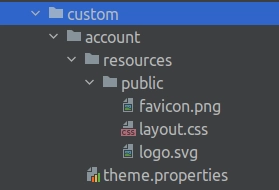
For reference, this is the structure of the account folder that we’re going to create:
On top of customising some styles in the layout.css file, I’m going to provide my own logo and favicon.
Change account styles
Since I’m going to extend the keycloak.v2 theme I’ll mirror its directory structure. First, I’m going to override some styles in my custom/account/resources/public/layout.css:
|
1 2 3 4 5 6 7 8 9 10 11 12 13 14 15 |
/*backend/docker/keycloak/themes/custom/account/resources/public/layout.css*/ :root { --pf-global--primary-color--100: #ff0054; --pf-global--primary-color--200: #d60248; --pf-global--primary-color--dark-100: var(--pf-global--primary-color--200); } .pf-c-data-list { --pf-global--primary-color--100: unset; } .pf-c-button { --pf-c-button--m-secondary--hover--Color: var(--pf-global--primary-color--200); --pf-c-button--m-secondary--hover--BorderColor: var(--pf-c-button--m-secondary--hover--Color); } |
In genral, I’m going to change the primary colour, unset a keycloak class that would override it and update button styles. Please note that we have disabled theme caching so trying different styles won’t consume much of your time 🙂
Configure the custom account type
For the configuration extending the keycloak.v2 theme I’m going to provide the following theme.properties file:
|
1 2 3 |
#backend/docker/keycloak/themes/custom/account/theme.properties parent=keycloak.v2 favIcon=/public/favicon.png |
That’s all we need to do to prepare the account type for our custom theme.
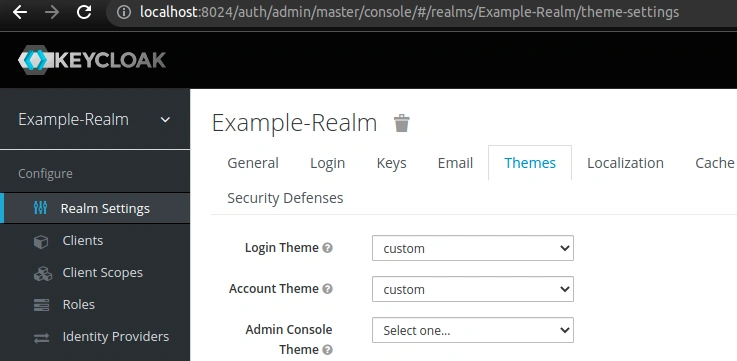
Enable the customised type
Again, login as admin to the admin panel (http://localhost:8024/auth/) and choose the custom theme as a value for the Accont Theme property in the realm settings:
Verify changes of the account type
Now, visit the: http://localhost:8024/auth/realms/Example-Realm/account page, login as one of the realm users and verify that the new theme is used instead of the default one:
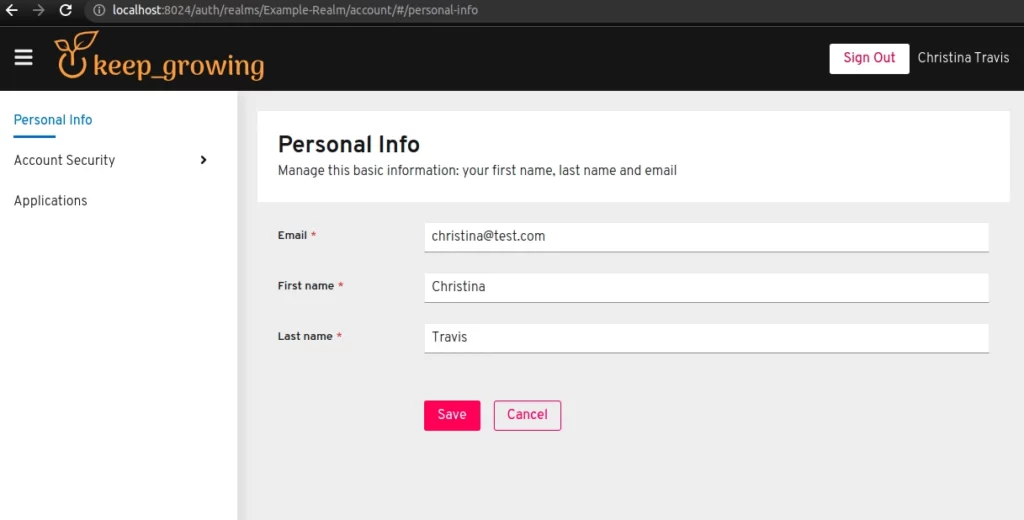
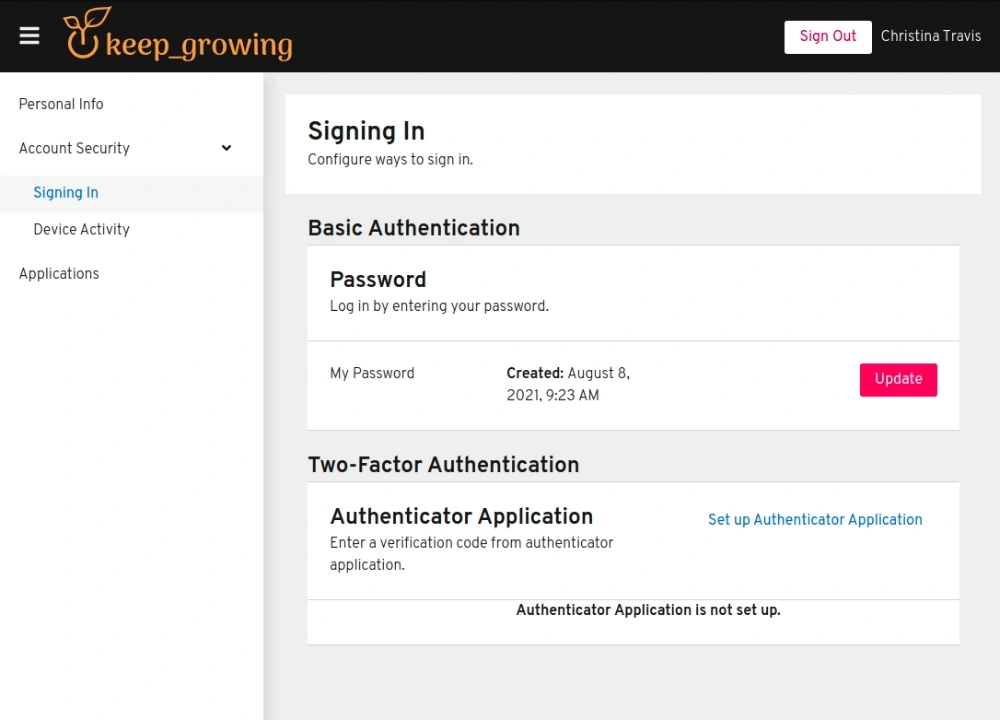
You can see the work presented in this article in the 861c7b3961cf3ab399fff091d92e827070532630 commit.
Learn more on how to customise Keycloak themes
- How to run Keycloak in a Docker container
- Official Keycloak example themes on GitHub
- Keycloak documentation on customising themes
Photo by Ezekixl Akinnewu from Pexels
Nice work. This helped me out a lot. I was restarting docker for everything I was doing -.-*
Thank you this information. Most of the “customise theme for Keycloak” posts are bizarre! This information works with the official docs and fills in the missing information there. Much appreciated.