
Postman comes with a wide variety of OAuth 2.0 compliant configuration options that allow us to authorize requests against a Keycloak protected API. The current standard recommendation is to use Authorization Code Flow with PKCE extension.
Prerequisites
- Minimum Postman version 7.23.
- The sample collection I’m using for this article is in my public Postman workspace and is part of my
keycloak-spring-bootapplication. If you want to run the project locally (it requires Docker for running a Keycloak instance), visit the project repository on GitHub and follow the directions in the README.md file. - If this is your first attempt to run Keycloak in Docker, I recommend reading the post Keycloak in Docker # 1 – How to run Keycloak in a Docker container, as I explained the basic configuration there.
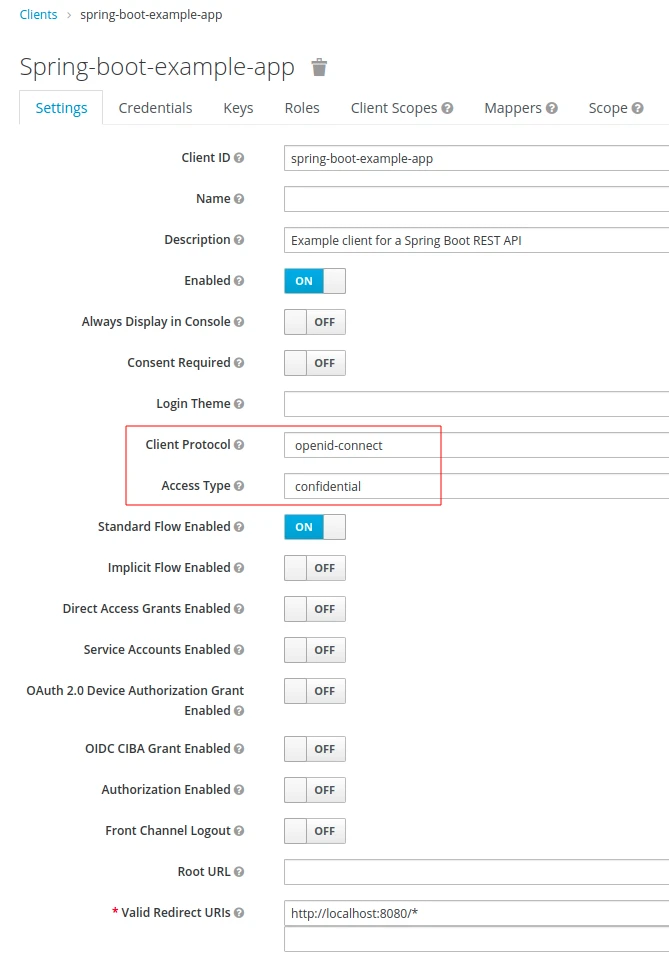
- The solution that I’ll show works for the following sample client configuration:
Why we should use the PKCE Grant Type to authorize Postman requests in Keycloak
I’ll show you how to get access tokens with the Proof Key for Code Exchange Grant Type (abbreviated PKCE, pronounced “pixie”) which is an extension to the Authorization Code Grant Type. The reason for using this particular flow in place of regular Authorization Code is because it provides additional protection against CSRF and authorization code injection attacks.
As we can read in the Authorization Code Grant Type documentation:
It is recommended that all clients use the PKCE extension with this flow as well to provide better security.
https://oauhttps://oauth.net/2/grant-types/authorization-code/
Furthermore, the PKCE description states that:
PKCE (RFC 7636) is an extension to the Authorization Code flow to prevent CSRF and authorization code injection attacks.
https://oauth.net/2/pkce/
In addition, my example Keycloak client is configured with the confidential Access Type. Consequently, it provides client secrets when exchanging temporary codes for tokens. This configuration may appear to provide sufficient protection. However, the documentation advocates using the PKCE extension even when we already apply client secrets:
PKCE is not a replacement for a client secret, and PKCE is recommended even if a client is using a client secret.
https://oauth.net/2/pkce/
Provide the data required for authorization in Keycloak to the Postman environment
In order to execute the authorization flow from Postman, I will have to enter some confidential and environment-sensitive details, e.g. Client Secret, Auth URL etc.:
I will store the sensitive data as environment variables. First, click the Environment quick look button (the eye icon) and click Edit for the selected environment. Then, you can start adding variables. Below you’ll see what information we need for the authorization flow and where to find the values.
Callback URL
Postman uses this url to extract the access token after a successful authorization in Keycloak. This is the Redirect URI value that I specified for my client in Keycloak:

I’m going to create the {{redirectUri}} variable with the http://localhost://8080/* value.
Auth URL and Access Token URL
I’m going to provide the authorization and token urls from the Keycloak OIDC URI endpoint list. To get the values, visit the general realm settings and click the OpenID Endpoint Configuration:
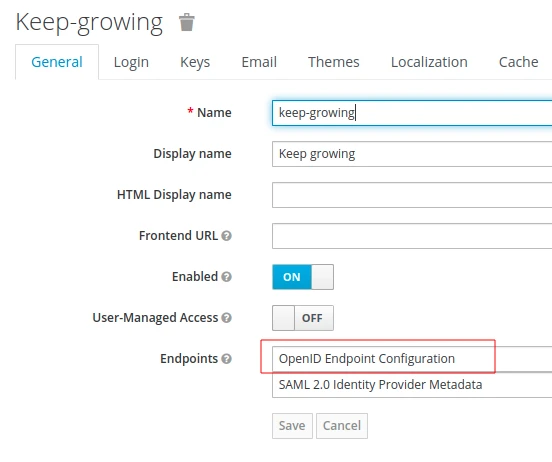
We’re going to see the authorization and token endpoints in the list below:

Make sure that the host is consistent with the security properties in your API. If you use 127.0.0.1 instead of localhost in the API security config, consequently use the 127.0.0.1 value for the urls in Postman. I’m going to create the following variables in Postman:
{{authUrl}}with thehttp://localhost:8024/auth/realms/keep-growing/protocol/openid-connect/authvalue{{accessTokenUrl}}with thehttp://localhost:8024/auth/realms/keep-growing/protocol/openid-connect/tokenvalue.
Client ID
It’s the identifier for our client:

I’m going to copy that value and put it in the {{clientId}} variable.
Client secret
As I mentioned before, my sample client has the confidential access type. Therefore, its configuration includes the Credentials tab, where I generated the following secret:
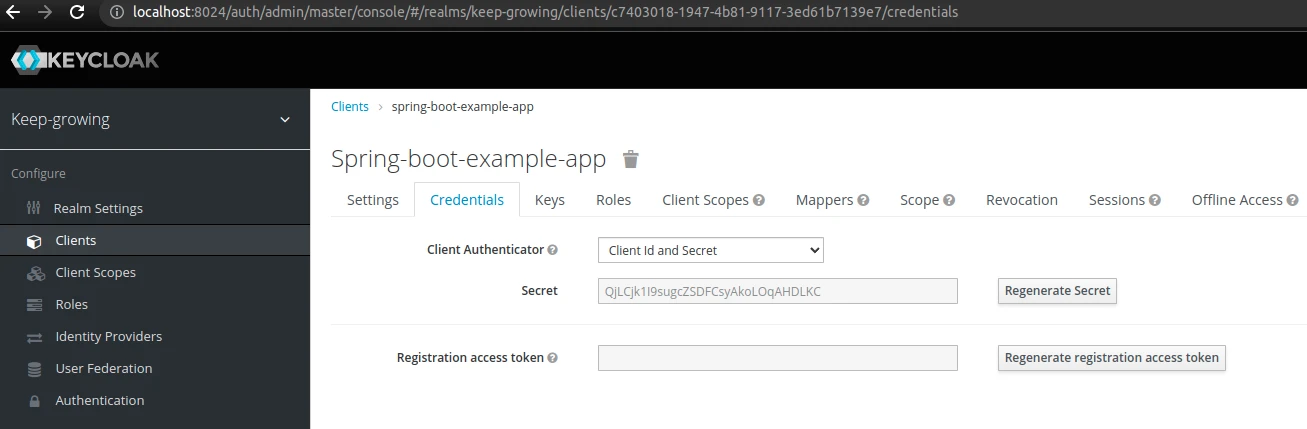
I’m going to copy that value and put it in the {{clientSecret}} variable.
Full variable list
To summarize, all the environment variables I have added to my Postman collection are below:
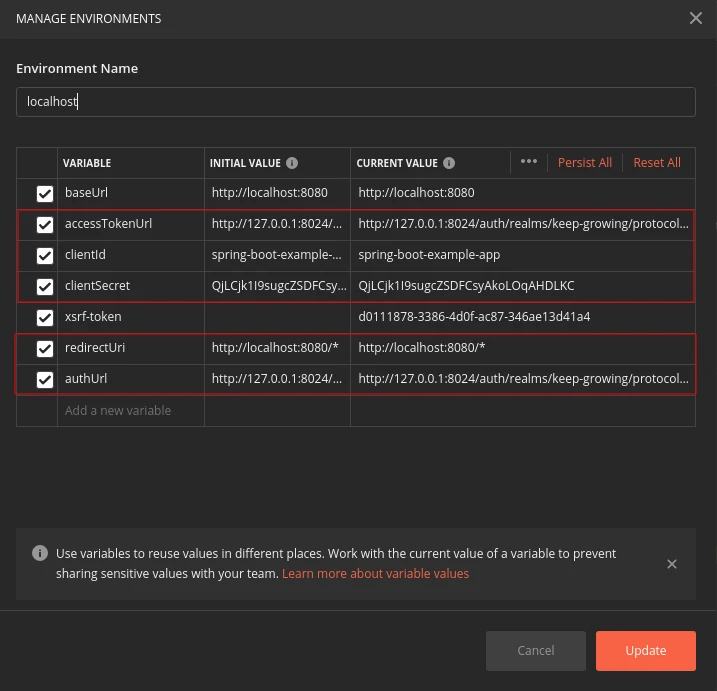
If your API uses csrf protection, read the How to add X-XSRF-TOKEN header to Postman requests article. Otherwise, you’ll get 403 errors even after completing this tutorial.
Configuration required to authorize Postman requests in Keycloak
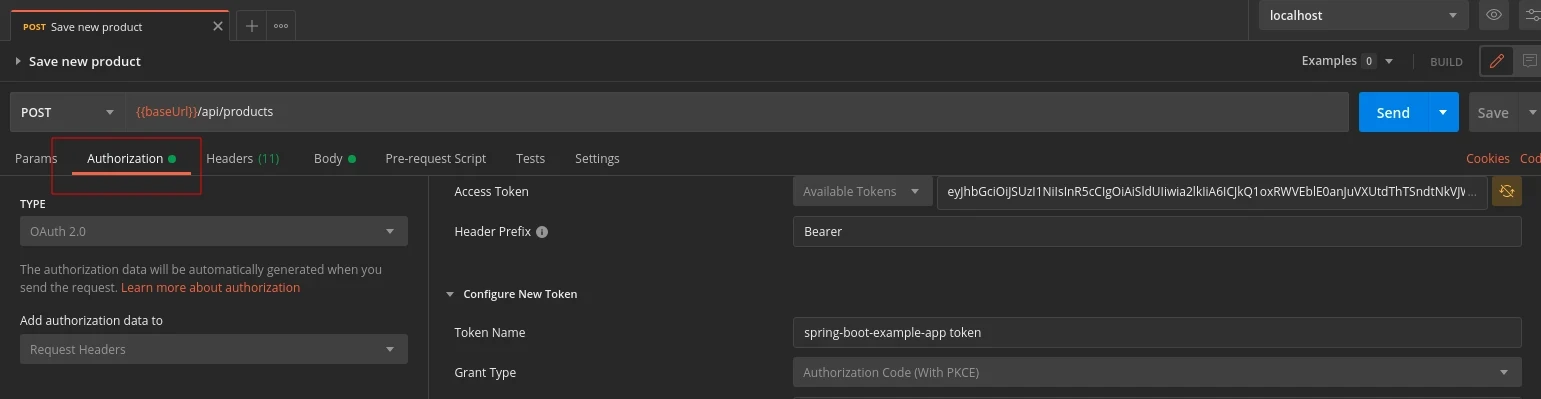
Now I will set up authorization for my Postman collection using the variables mentioned above and providing some additional information. First, I’ll edit the collection:
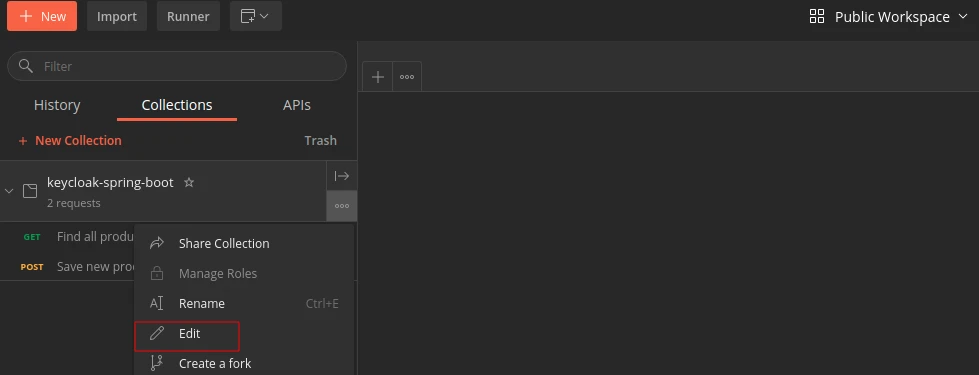
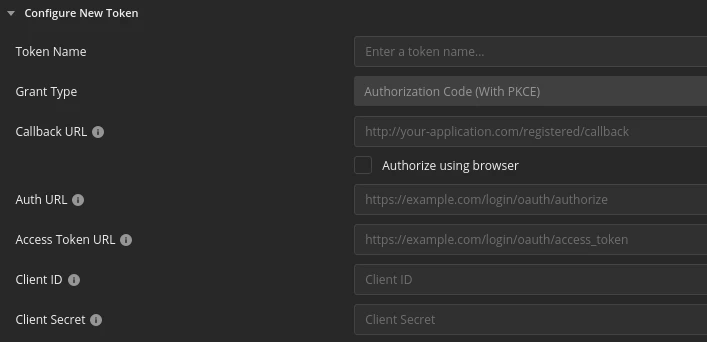
Then, I’ll and go the Authorization tab and select the OAuth 2.0 authorization type to configure a new token. Below you’ll see what additional information I’m going to provide.
Add authorization data to
I’m going to select the Request Headers option.
Token Name
This is an arbitrary value to distinguish this particular token from others you keep in Postman. I’m going to call it spring-boot-example-app token.
Grant Type
I’m going to select the Authorization Code (With PKCE) option.
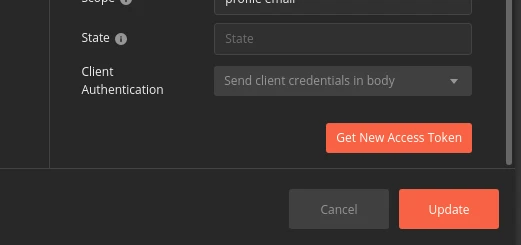
Scope
Verify what scopes are available for your client.:
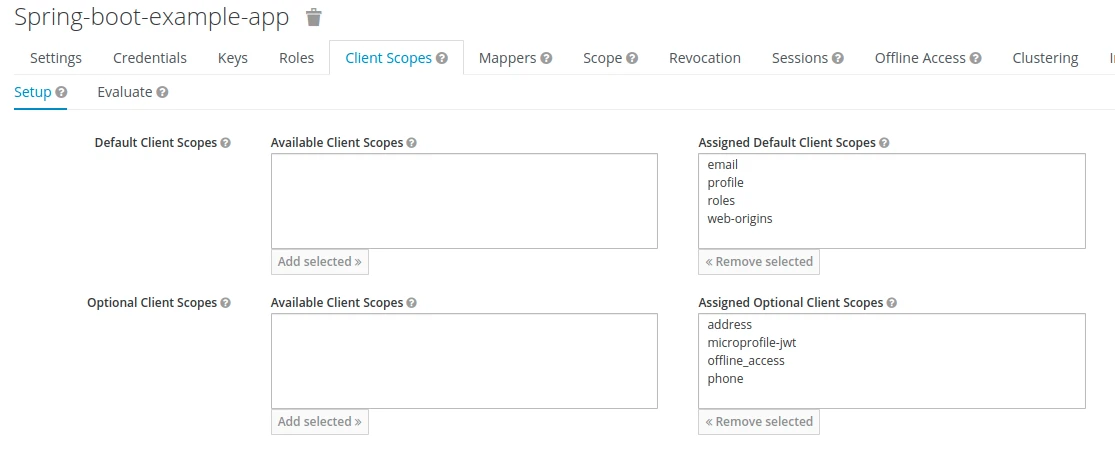
I’m going to provide the profile email value here.
Client Authentication
I’m going to select the Send client credentials in body option.
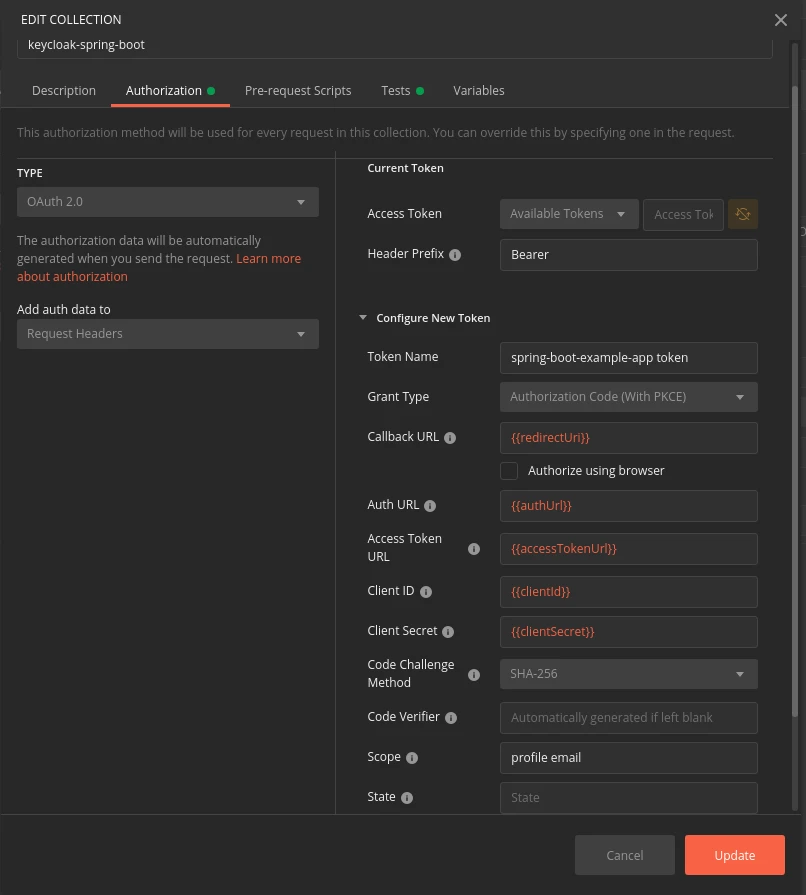
Full configuration
You can see the complete configuration in the screenshot below:
Get a new Access Token
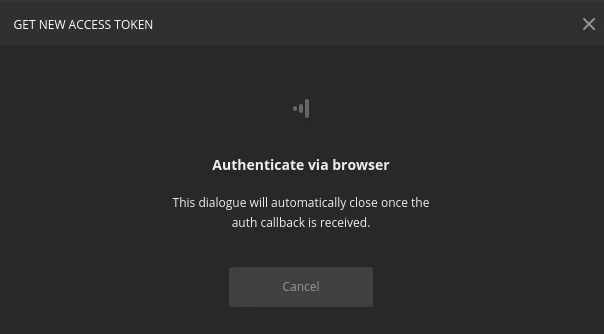
Finally, we can click the Get new Access Token button. We’re going to see the following Postman screen informing us that authentication will be done through a browser:
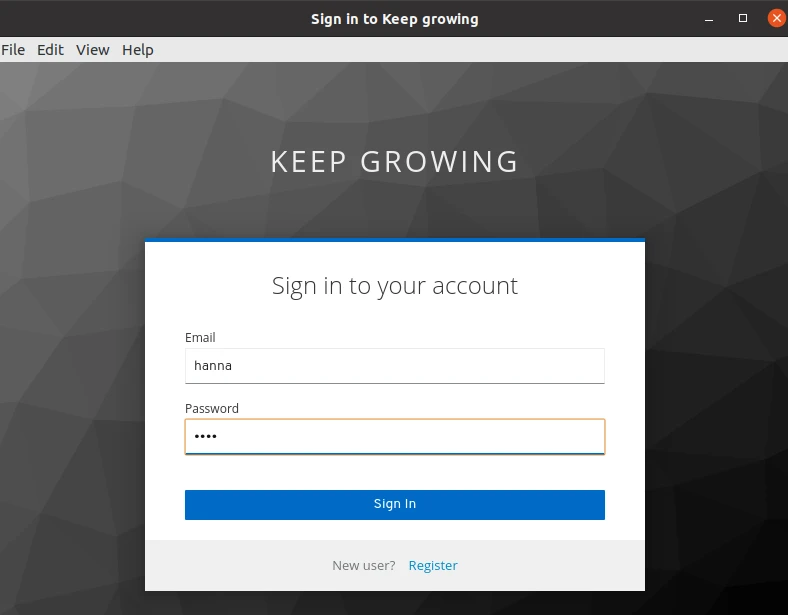
Meanwhile, our authorization server will provide the a login form. Below you can see my Keycloak login screen where I authenticate as an example user of my realm:
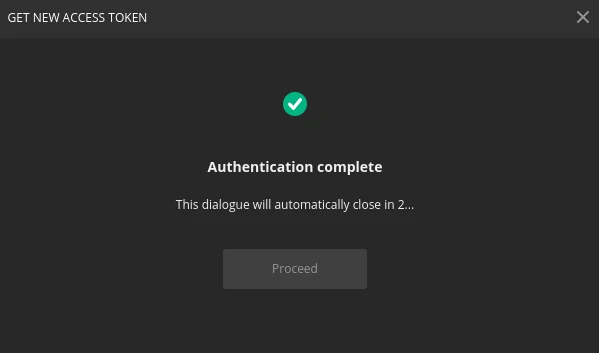
After successful authentication, we will see the following screen for a few seconds:
As a result, a new spring-boot-example token value is available in the Manage Access Token window. Click the Use Token button:

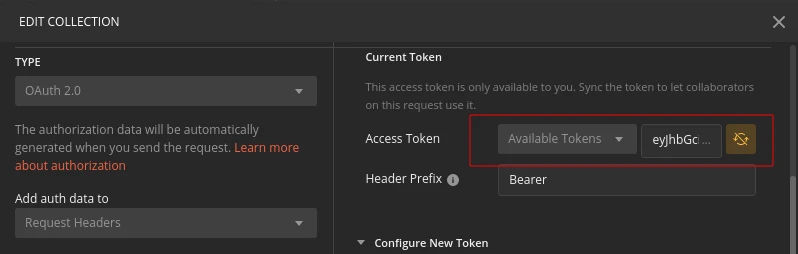
You’ll see the token value in the Current Token section:
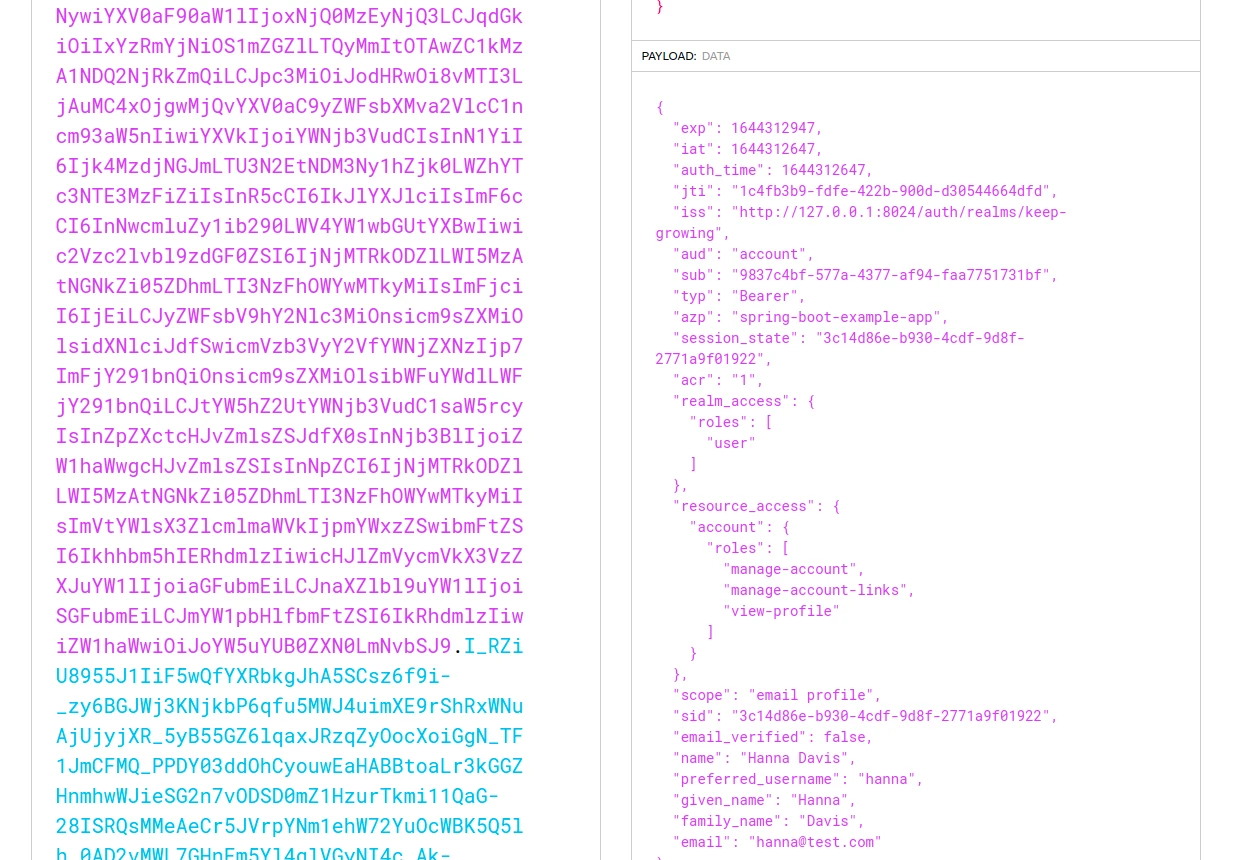
Furthermore, we can verify the token payload by decoding it with jwt.io:
Make the token available in all requests
To make this token accessible in all requests in my collection, I’m going to select the Inherit auth from parent option in the request Authorization tab:

As a result, Keycloak will authorize all requests with this config from my Postman collection.
Update and manage Access Tokens
When the token expires, generate a new value. Just edit your collection, go to the Authorization tab, click the Generate New Access Token button, then click the Use Token button and finally click the Update button:
To update the token or to overwrite the collection config for only one request, go to the Authorization tab of that request and select the OAuth 2.0 for the authorization type. You’ll be able to generate a new token or redefine the configuration values:
Furthermore, you can select a specific token value from the Available Tokens dropdown:

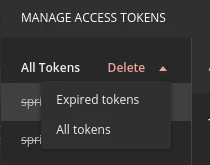
Finally, you can remove some tokens by clicking the Manage Tokens option:
Why not other flows
You can still find tutorials on setting up other Authorization Flows. However, here are the documented reasons why I don’t use them in my application.
Why not Implicit flow
This is the easiest flow. Nonetheless, it comes with some severe security vulnerabilities:
The implicit grant (…) and other response types causing the authorization server to issue access tokens in the authorization response are vulnerable to access token leakage and access token replay (…).
https://datatracker.ietf.org/doc/html/draft-ietf-oauth-security-topics#section-2.1.2
Moreover, no viable mechanism exists to cryptographically bind access tokens issued in the authorization response to a certain client (…). This makes replay detection for such access tokens at resource servers impossible.
In order to avoid these issues, clients SHOULD NOT use the implicit grant (…), unless access token injection in the authorization response is prevented and the aforementioned token leakage vectors are mitigated.
The vulnerabilities were described in depth in the Implement the OAuth 2.0 Authorization Code with PKCE Flow post on the Okta blog:
Notice that after you authenticate, the Authorization Server (like Google) responds directly with tokens. This means that the tokens are in your browser’s address bar as a result of the redirect. That’s problematic since Google can’t definitively know that your browser (the intended recipient) actually received the response. It’s also problematic because modern browsers can do browser history syncing and they support browser extensions that could be actively scanning for tokens in the browser address bar. Leaking tokens is a big security risk.
https://developer.okta.com/blog/2019/08/22/okta-authjs-pkce#why-you-should-never-use-the-implicit-flow-again
As a result of these security concerns, the Implicit Flow is officially deprecated:
Please note that as of 2020, the implicit flow is about to be deprecated by OAuth 2.0 Security Best Current Practice. Recommended for most use case is Authorization Code Grant flow with PKCE.
https://spec.openapis.org/oas/latest.html#security-scheme-object
Why not Password flow
Another convenient flow that we can configure in Postman, the Password Credentials Grant Type, also comes with an increased risk of attack:
The resource owner password credentials grant MUST NOT be used. This grant type insecurely exposes the credentials of the resource owner to the client. Even if the client is benign, this results in an increased attack surface (credentials can leak in more places than just the authorization server) and users are trained to enter their credentials in places other than the authorization server.
https://datatracker.ietf.org/doc/html/draft-ietf-oauth-security-topics-13#section-3.4
Because the client application has to collect the user’s password and send it to the authorization server, it is not recommended that this grant be used at all anymore.
https://oauth.net/2/grant-types/password/
More on how to authorize Postman requests in Keycloak
- Authorizing requests, OAuth 2.0 authorization type, Requesting an OAuth 2.0 token in the Postman documentation and the example collection that documents a few OAuth 2.0 authorization flows.
- OAuth 2.0: Implicit Flow is Dead, Try PKCE Instead and OAuth 2 Simplified articles.
- Proof Key for Code Exchange by OAuth Public Clients