OpenJDK 17 is available both through Ubuntu’s default repository and as a standalone package for manual installation. Read this short guide on how to download the latest LTS release and set it as the default version on your system.
Prerequsites
First off, I’m working on Ubuntu 20.04 LTS and all the commands in this article have been executed on the following release:
|
1 2 3 4 5 6 |
$ lsb_release -a No LSB modules are available. Distributor ID: Ubuntu Description: Ubuntu 20.04.3 LTS Release: 20.04 Codename: focal |
Furthermore, I already use OpenJDK 14 so I’m going to replace it with the newer version.
Install OpenJDK 17 on Ubuntu
I’m going to install OpenJDK from Ubuntu’s default repository. However, you can install it manually if you like – you’ll find the instructions below.
From the default Ubuntu repository
The easiest approach we can take is to install OpenJDK from Ubuntu’s repo. First, make sure that the package information on your machine is up to date and that you have all available upgrades with the following commands:
|
1 2 |
sudo apt update sudo apt upgrade |
Next, we’re going to get metadata on available packages for the openjdk-17 by querying the APT cache with:
|
1 |
apt-cache search openjdk-17 |
The output should include the openjdk-17-jdk package as seen in the screenshot below:

To make sure that the package list is up to date, remember to run the aforementioned apt update command first.
We’ve just verified that the package is available, so we can finally install it with the following command:
|
1 |
sudo apt install openjdk-17-jdk |
We can verify the location of the newly installed java files with the update-alternatives command:
|
1 |
update-alternatives --list java |
Here are the entries that were listed in my case:
|
1 2 3 |
update-alternatives --list java /usr/lib/jvm/java-14-openjdk-amd64/bin/java /usr/lib/jvm/java-17-openjdk-amd64/bin/java |
Manual installation
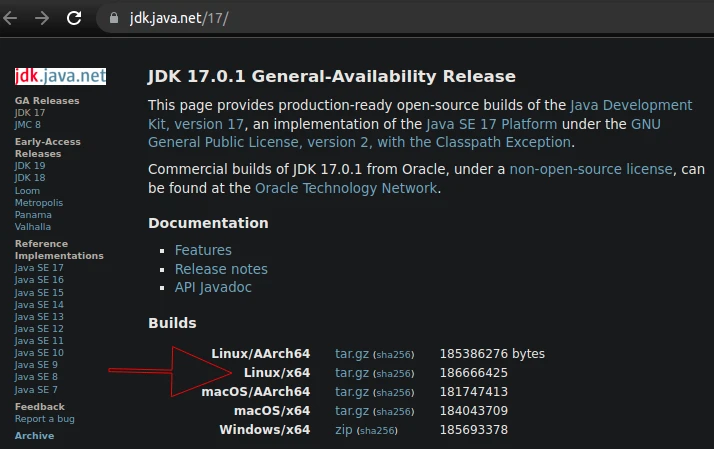
Alternatively, you can install the OpenJDK package – namely JDK 17.0.1 General-Availability Release manually:

Copy the url for the Linux/x64 build and download the files with the wget command:
|
1 |
wget https://download.java.net/java/GA/jdk17.0.1/2a2082e5a09d4267845be086888add4f/12/GPL/openjdk-17.0.1_linux-x64_bin.tar.gz |
Then, extract the downloaded file. If you want to extract it to e.g. /usr/java directory, use the following command:
|
1 |
sudo tar xf openjdk-17.0.1_linux-x64_bin.tar.gz -C /usr/java |
Below is the short description of the options used with the tar command:
x– extract the given file from an archive (operation mode);f– use archive file (device selection);C /usr/java – change to the/usr/javadirectory before performing any operations (local file selection).
Remember the location you choose for the package as this will be used when setting the JAVA_HOME environment variable.
Set Java 17 as the default version
We’re going to follow the steps described in the How to permanently set JAVA_HOME on Ubuntu post. In short, I’m going to edit my jdk_home.sh script:
|
1 |
sudo nano /etc/profile.d/jdk_home.sh |
The resulting file should look like this:
|
1 2 |
export JAVA_HOME=/usr/lib/jvm/java-17-openjdk-amd64 export PATH=$PATH:$JAVA_HOME/bin |
Logout and login back to the system. Verify that the JAVA_HOME value is correct:
|
1 2 |
echo $JAVA_HOME /usr/lib/jvm/java-17-openjdk-amd64 |
Furthermore, check the active java version with the java --version command:
|
1 2 3 4 |
java --version openjdk 17.0.1 2021-10-19 OpenJDK Runtime Environment (build 17.0.1+12-Ubuntu-120.04) OpenJDK 64-Bit Server VM (build 17.0.1+12-Ubuntu-120.04, mixed mode, sharing) |
Java-Maven compatibility issue
You may run into problems when trying to work with Java 17 projects and an existing maven installation. Using Maven 3.6 to run the mvn commands results in the following error:
|
1 2 3 |
[ERROR] Error executing Maven. [ERROR] java.lang.IllegalStateException: Unable to load cache item [ERROR] Caused by: Unable to load cache item |
Learn how to solve this issue in the How to fix “Error executing Maven” issue after updating to Java 17 post.
