We can significantly speed up progress on our Angular application when we enhance it with Bootstrap styles and ng-bootstrap widgets. Bootstrap classes will immediately transform the look and feel of our project and thanks to Angular-native components from ng-bootstrap we won’t be needing Bootstrap javascript.
Prerequisites
- You can find the example project that I use in this post in the efficient-mvp-example repository, in the frontend/src/main/angular module.
- At the time of writing this post, my Angular version is as follows:
|
1 2 3 4 5 6 7 8 9 10 11 12 13 14 15 16 17 18 |
Angular CLI: 12.1.2 Node: 14.17.1 Package Manager: npm 6.14.13 OS: linux x64 Angular: 12.1.2 ... animations, cli, common, compiler, compiler-cli, core, forms ... platform-browser, platform-browser-dynamic, router Package Version --------------------------------------------------------- @angular-devkit/architect 0.1201.2 @angular-devkit/build-angular 12.1.2 @angular-devkit/core 12.1.2 @angular-devkit/schematics 12.1.2 @schematics/angular 12.1.2 rxjs 6.6.7 typescript 4.2.4 |
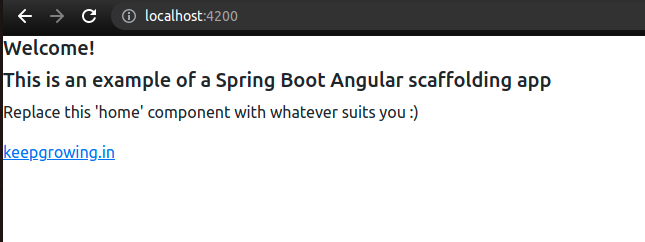
- The starting point for the work presented in this post is contained in the commit 0d90b94868dcd1d5245bf1d80a20cda3d87de6db. You can see a custom home page for my example Angular application without Bootstrap and ng-bootstrap on the image below:

- And here you can see the
htmlcode responsible for the page:
|
1 2 3 4 5 6 7 8 9 10 11 12 13 14 15 |
<!--frontend/src/main/angular/src/app/pages/home-page/home-page.component.html--> <div> <h5>Welcome!</h5> <div> <h5>This is an example of a Spring Boot Angular scaffolding app</h5> <p> Replace this 'home' component with whatever suits you :) </p> </div> <div> <a href="https://keepgrowing.in/" target="_blank" rel=noopener> keepgrowing.in </a> </div> </div> |
Add ng-boostrap to your Angular project
As I said before, we won’t be needing any Bootstrap javascript in our project. Instead, we’re going to add ng-bootstrap components.
Installation
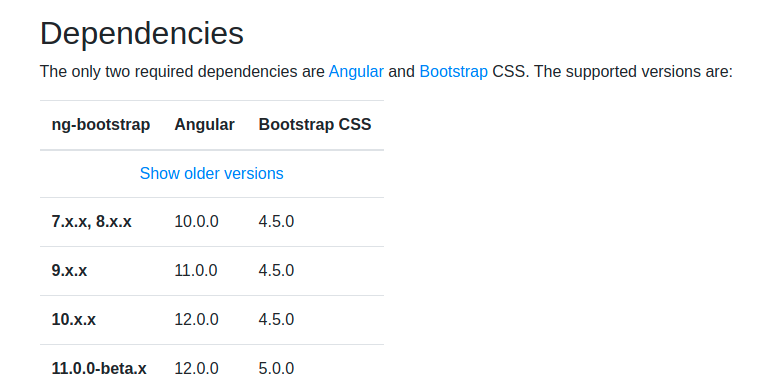
Remember to check out the installation command on the official ng-bootstrap Getting started page. You’ll find there not only commands for installing the library, but also the compatibility matrix for its dependencies:

At the moment of writing this post, I can install the version that is compatible with Bootstrap 5 with the following npm command:
|
1 |
npm install @ng-bootstrap/ng-bootstrap@next |
We’ll see the library entry in our package.json file:
|
1 2 3 4 5 6 7 8 9 10 |
{ "name": "angular", … "dependencies": { … "@ng-bootstrap/ng-bootstrap": "^11.0.0-beta.2", … }, … } |
To make the ng-bootstrap modules accessible for our Angular app, we need to add them in the imports section in the app.module.ts file. On the other hand, we can also add the whole library with NgbModule. However, the resulting bundle will be larger. Therefore, remember that you can tailor imports to your needs. Below you can see an example with the whole library imported:
|
1 2 3 4 5 6 7 8 9 10 11 12 13 14 15 |
// frontend/src/main/angular/src/app/app.module.ts … import {NgbModule} from "@ng-bootstrap/ng-bootstrap"; @NgModule({ declarations: [ … ], imports: [ … NgbModule ], … }) export class AppModule { } |
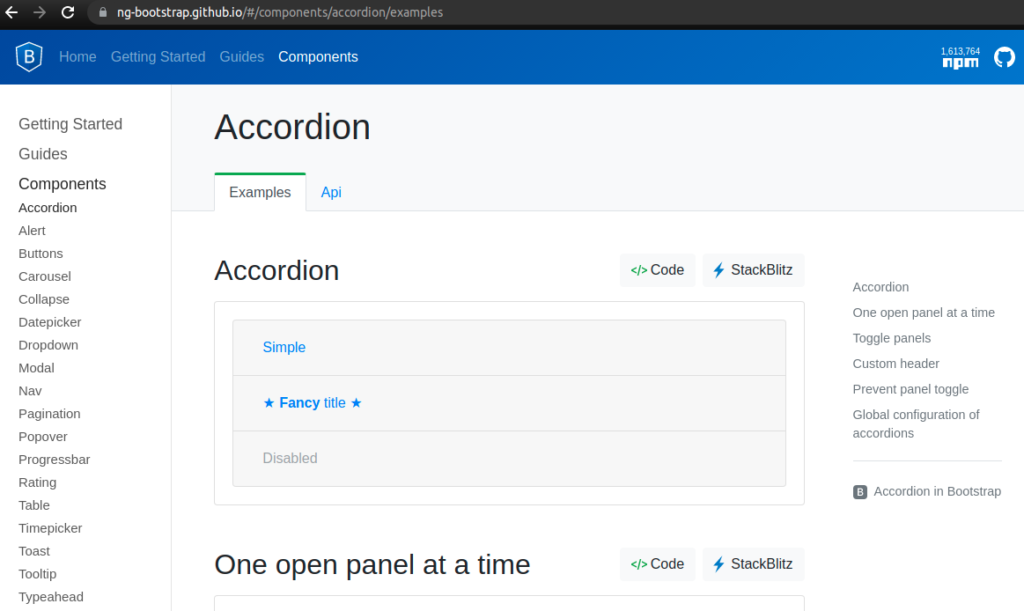
Thanks to that, we have a rich library of interactive components that work out of the box with Angular and will be familiar to anyone who used Bootstrap in the past:

Add Bootstrap styles to your Angular project
We’re going to install Bootstrap and use only its clasess in our project.
Installation
First, we’re going to install Bootstrap with the following npm command:
|
1 |
npm install bootstrap |
The package manager will add the appropriate entry in our package.json file:
|
1 2 3 4 5 6 7 8 9 10 |
{ "name": "angular", … "dependencies": { … "bootstrap": "^5.0.2", … }, … } |
Preparing for extensibility
We will most likely want to override some Bootstrap styles or provide additional variables, scss code, etc. Let’s prepare the scss directory structure so that we can easily change the look and feel of our app in the future.
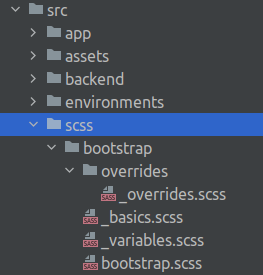
You can check the resulting file structure in our scss/bootstrap directory in the image below for reference.:

First, we need to create the scss/bootstrap folder. Inside we can prepare empty files for the things we’re planning to work on. In my case I’m going to add _variables.scss because that’s usually the first thing I want to customize.
Consequently, to make extending the default classes easier, we’re going to add the _basics.sccs file. This will be the place for keeping all imports that are required for the extended code to work properly:
|
1 2 3 4 5 |
//frontend/src/main/angular/src/scss/bootstrap/_basics.scss @import "~bootstrap/scss/functions"; @import "~bootstrap/scss/mixins"; @import "variables"; @import "~bootstrap/scss/variables"; |
With all those imports in one file, extending default component styles will be more straightforward and organized. Now we can prepare the overrides directory for keeping our styles for Bootstrap components like _navbar.scss, _tables.scss, etc. For the moment, all we need in this directory is an empty _overrdies.scss file.
| I’ll show you an example of extending Bootstrap later in this post. |
Following the Bootstrap convention, we’re going to keep all imports in the bootstrap.scss file:
|
1 2 3 4 |
//frontend/src/main/angular/src/scss/bootstrap/bootstrap.scss @import "variables"; @import "~bootstrap/scss/bootstrap"; @import "overrides/overrides"; |
Usage
Add import for our bootstrap.scss file in the styles.scss file:
|
1 2 3 4 |
// frontend/src/main/angular/src/styles.scss /* You can add global styles to this file, and also import other style files */ @import "scss/bootstrap/bootstrap"; |
Finally, we can use Bootstrap classes in our Angular app! I’m going to add them in my home-page.component.html file:
|
1 2 3 4 5 6 7 8 9 10 11 12 13 14 15 |
<!--frontend/src/main/angular/src/app/pages/home-page/home-page.component.html--> <div class="card ms-3 me-3 mt-3 text-center"> <h5 class="card-header">Welcome!</h5> <div class="card-body"> <h5 class="card-title">This is an example of a Spring Boot Angular scaffolding app</h5> <p class="card-text mt-4"> Replace this 'home' component with whatever suits you <i class="bi bi-emoji-smile" aria-hidden="true"></i> </p> </div> <div class="card-footer mt-4"> <a href="https://keepgrowing.in/" target="_blank" rel=noopener> keepgrowing.in </a> </div> </div> |
As a result, the page will look like on the following screenshot:

The work done in this section is contained in the commit c3181d57606e878813606e69ab2df36fcf639a5d.
Extending Bootstrap styles
We’re going to customize the card from the home page example.
Override components
Let’s change the card border style from solid to dashed. We’re going to create the overrides/_card.scss file with the following content:
|
1 2 3 4 5 6 |
//frontend/src/main/angular/src/scss/bootstrap/overrides/_card.scss @import "../basics.scss"; .card { border: $card-border-width dashed $card-border-color; } |
Thanks to importing our basics.scss file, we can comfortably use the Bootstrap variables ($card-border-width and $card-border-color) without our IDE complaining about it.
Now we have to actually use this customized class. Therefore, we’re going to import it in our _overrides.scss file:
|
1 2 |
//frontend/src/main/angular/src/scss/bootstrap/overrides/_overrides.scss @import "card"; |
That’s all we need to see the changes in the browser. Let’s customize colour palette on top of that.
Override variables
For this example, we’re going to replace some default colours with the ones I defined. Add the following lines to the _variables.scss file:
|
1 2 3 4 5 6 7 8 9 10 |
//frontend/src/main/angular/src/scss/bootstrap/_variables.scss $off-white: #fdfffc; $blue: #011627; $orange: #ff9f1c; $card-cap-bg: $blue; $card-cap-color: $off-white; $link-color: $orange; $card-bg: $off-white; $card-border-color: $blue; |
As a result, our page will look like this:

The work done in this section is contained in the commit 829b5d523ed8d00c0b3f778f691b10e82138eba5.
Learn more on using Bootstrap and ng-bootstrap with Angular
- Read more about theming, customizing, and extending Bootstrap
- Using the ng-bootstrap components is out of the scope of this post but the official documentation contains useful usage examples
- Enhance the presentation layer of your multi-layout Angular app
Photo by Leandro R. Barbosa from Pexels, Color Palette used to customize Bootstrap variables
